
3 Ingredient Peanut Butter Cookies: A Simple Small-Batch Bake
These 3 ingredient peanut butter cookies keep the shopping list short: peanut butter, sugar, and one egg. There is no flour to measure and no butter to soften, making this a straightforward option when you want a simple dessert.
The finished cookies are different from traditional flour-based peanut butter cookies. Expect a pronounced peanut flavor and a delicate texture that becomes firmer as the cookies cool. Treat the cooling time as part of the recipe rather than an optional pause.
Table of Contents
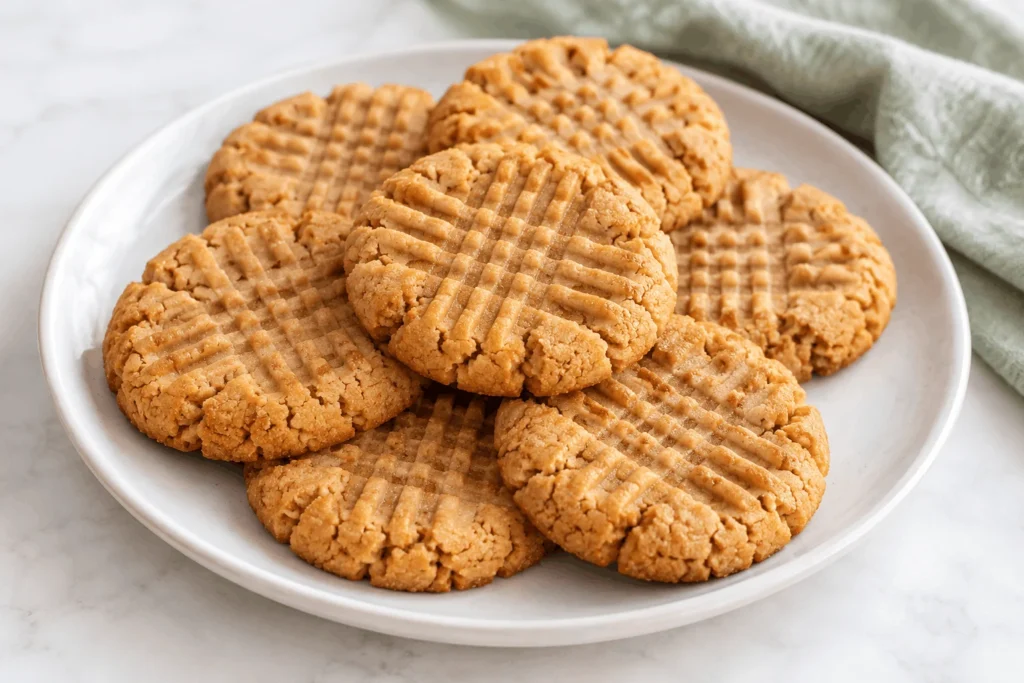
For the best 3 ingredient peanut butter cookies, measure the peanut butter carefully and keep the dough portions even. The cookies continue to firm up on the baking sheet, so let them cool before moving them.
Recipe at a glance
- Yield: about 16 cookies
- Prep: about 10 minutes
- Bake: 10–12 minutes per tray
- Cooling: at least 10 minutes on the baking sheet
- Oven: 350°F / 175°C, conventional
Ingredients
- 270 g creamy peanut butter (about 1 cup)
- 200 g granulated sugar (1 cup)
- 1 large egg
Choose a conventional, well-blended creamy peanut butter for the most predictable dough. A jar with a thick layer of separated oil can behave differently. If that is what you have, stir it thoroughly before measuring and expect to adjust the chilling time.
Equipment
A mixing bowl, sturdy spoon or hand mixer, baking sheet, parchment paper, fork, and cooling rack are enough. A small cookie scoop helps keep the portions even, but two spoons will do the job.
How to make 3 ingredient peanut butter cookies
- Heat the oven to 350°F / 175°C. Line a baking sheet with parchment paper.
- Stir the peanut butter and sugar together until evenly blended. Add the egg and mix until you have a cohesive dough with no visible streaks of egg.
- Divide into 16 portions. Roll each portion gently into a ball and place on the sheet, leaving about 2 inches between them.
- Press each ball with a fork, then press again across the first marks to make a crosshatch. Aim for discs about 1/2 inch thick. Wipe the fork between presses if it sticks.
- Bake for 10–12 minutes, checking from 10 minutes onward. The edges should look set and the surface should lose its wet shine. The cookies will still feel soft while hot.
- Leave them undisturbed on the sheet for at least 10 minutes. Move them carefully to a rack only when they can hold together.
What to do if the dough is sticky
Peanut butter consistency varies between brands. If the mixture sticks heavily to your hands, refrigerate it for 15–20 minutes before shaping. Avoid adding flour immediately: that changes the three-ingredient formula and the final texture.
A very oily mixture may not become easy to handle just by chilling. In that case, bake one small test cookie first. A change of peanut butter can matter more than a change of mixing technique.
How much should you flatten them?
The fork marks help create an even thickness. A thick ball can brown outside before the center bakes through, while a very thin disc can become brittle. Keep all the portions roughly the same height so one tray finishes at the same time.
Do not use a fork that has touched raw egg mixture to serve the finished cookies without washing it first.
Common questions
Can I use crunchy peanut butter?
You can, although the peanut pieces make shaping less smooth and the finished cookie more crumbly. Keep the weight the same and press gently.
Can I reduce the sugar?
Sugar contributes to structure as well as sweetness. A large reduction can change how these cookies spread and hold together. Start with the stated amount before developing a lower-sugar version.
Are these automatically gluten-free?
No wheat flour is added, but a gluten-free claim depends on the ingredients and preparation environment. Check every label and avoid cross-contact if cooking for someone with a dietary restriction. These cookies contain peanuts and egg.
Storage
Let the cookies cool completely before packing them in a covered container. Stack with parchment between layers to protect the fork-marked tops. Enjoy within a few days for the best texture, or freeze the cooled cookies in a sealed container.
Experimenting with different flavors can enhance the cookie experience. Consider adding chocolate chips or nuts for extra texture and taste. When baking, keep an eye on the time, as slight variations can affect the final product. If you’re looking for a healthier twist, try substituting some of the fat with applesauce or yogurt. Always remember to adjust baking times accordingly when making ingredient substitutions.
Serving ideas
Serve a couple of cookies with tea, coffee, or a glass of milk. For a dessert platter, pair them with fruit or a different cookie texture. Clearly label the peanuts when serving a mixed group.
Baking safely
Ensure to follow proper guidelines when preparing these cookies, particularly if serving individuals with dietary restrictions. It is crucial to check ingredient labels thoroughly and take measures to avoid cross-contact. These delightful cookies incorporate peanuts and egg, making it essential to be vigilant about allergies.
Once baked, allow the cookies to cool entirely before storing them in a covered container. To maintain their quality, consider placing parchment paper between layers to prevent them from sticking together. For optimal freshness and texture, enjoy these cookies within a few days or freeze them in a sealed container for later indulgence.
When it comes to serving, a couple of these cookies can complement a warm cup of tea, coffee, or a refreshing glass of milk. For a more elaborate dessert presentation, consider pairing them with fresh fruit or cookies of varying textures. Additionally, if serving to a mixed group, be sure to clearly label the cookies containing peanuts to ensure everyone’s safety.
As a reminder, the cookie dough contains raw egg, which necessitates thorough baking before consumption. It is advisable to clean all utensils used during preparation to maintain kitchen hygiene. The CDC emphasizes the importance of not tasting raw dough to avoid potential health risks.